


When it comes to talking about modern cabinetry and furniture construction, smooth and sturdy drawer movements are no longer optional; they are expected. This is why choosing the right ball bearing drawer slides is crucial for both functionality and durability. Not only do they ensure seamless opening and closing, but they also increase the overall value and practicality of your storage systems. If you’re planning to upgrade your cabinetry or do a DIY project, learning how to install drawer slides properly is, therefore, a must.
In this guide, we will discuss everything you need to know, from preparation to finishing touches, about installing drawer channel systems, ensuring your drawers glide effortlessly for years to come.
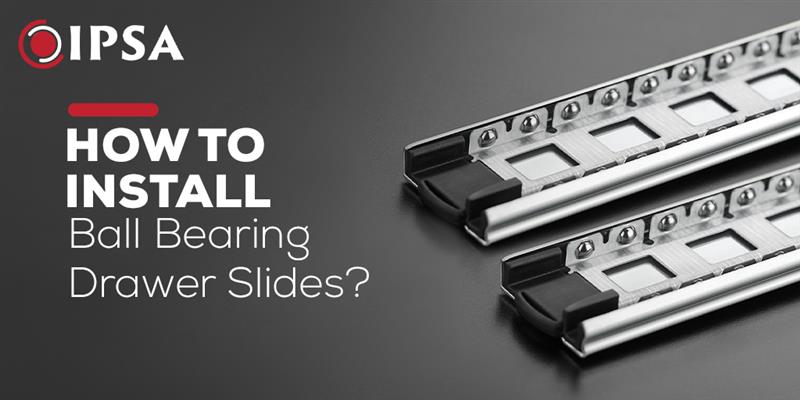
Understanding Ball Bearing Drawer Slides
Before diving into installation, it’s important to understand what ball bearing drawer slides are. These slides feature ball bearings inside metal runners, which ensure smooth, quiet, and long-lasting sliding. As a result, they outperform traditional wooden or roller slides because of their high load capacity, durability, and precision.
Additionally, many modern kitchen cabinets, desks, tool kits, and wardrobe drawers depend on drawer slides for a superior user experience. Unlike other systems, a drawer channel with ball bearings offers minimal friction, even when supporting heavy loads.
Why Choose These Drawer Slides?
Here are several advantages that make ball bearing drawer slides a popular choice.
-
High weight capacity.
-
Smooth, silent gliding.
-
Rust-resistant materials (usually stainless or galvanized steel).
-
Easy maintenance
-
Long lifespan
Additionally, if performance, durability, and ease of use are high on your checklist, installing drawer channel systems with ball bearings becomes the ideal option.
Tools and Materials Need To Know
To carry out a flawless installation of drawer slides, gather the following tools:
-
Measuring tape.
-
Carpenter’s pencil
-
Level
-
Power drill
-
Screwdriver bits
-
Screws (usually included with the slides)
-
Mounting brackets (if needed)
-
Your chosen ball-bearing drawer slides
Before starting, double-check that the slides match the length of your drawer box. Otherwise, you may encounter alignment issues during installation.
7 Major Steps To Ball Bearing Drawer Slides
Here are 7 major steps to understand how to install the ball bearing drawer slides.
Step 1: Prepare Your Workspace
First, clear your work area to make precise installation easier. Clean both surfaces after removing the drawer from the cabinet. Additionally, ensure there is sufficient lighting, as accuracy is crucial when positioning the drawer channel.
Step 2: Measure and Mark the Placement
Next, use your measuring tape to find the height where the ball bearing drawer slides will be mounted. Make sure to:
-
Mark equal heights on both sides of the cabinet
-
Use a level to avoid tilting
For instance, if you mount the drawer slides too high on one side or too low on the other, the drawer will not sit correctly in the drawer channel.
Step 3: Install the Cabinet Member
Each ball bearing drawer slide assembly typically comes with two parts:
-
Cabinet member (attaches to the cabinet)
-
Drawer member (attaches to the drawer box)
At this stage, align the cabinet member with your markings and secure it using screws and a drill. Of course, wood splitting is less likely when pilot holes are drilled beforehand. After mounting both cabinet sides, double-check for accuracy using the level, as it ensures effortless gliding later.
Step 4: Attach Slides to the Drawer
The drawer channel’s sliding portion can now be removed, often by pulling a release lever. Then, position it along the side of your drawer box, centered and parallel. Screw it into place, starting from the front and moving toward the back. Verify that the height of the mountings on both sides is the same. With careful alignment, the drawer slides will move smoothly once assembled.
Step 5: Insert the Drawer Into the Cabinet
Next, the drawer members should be carefully installed into the cabinet members by pushing the drawer straight in. The ball bearings in the ball bearing drawer slides help guide the assembly, clicking into place once fully aligned. At this point, you should feel a smooth motion as you test slide it in and out.
Take the drawer out and check the alignment if resistance appears. Often, minor adjustments in the drawer channel attachment resolve the issue effortlessly.
Step 6: Test and Adjust
Once inserted completely, repeatedly open and close the drawer, ensuring the drawer slides move freely. If you notice any sticking, wobbling, or uneven gaps:
-
Tighten loose screws
-
Adjust slide placement slightly
-
Confirm the drawer box isn’t warped
Although installation may feel intimidating at first, adapting your technique based on test results is what ensures long-term performance.
Step 7: Final Touches
Once satisfied with the movement, go ahead and secure any mounting brackets or back plates provided. These help stabilize and reinforce the ball bearing drawer slides, especially for heavier drawers like those holding tools or cookware.
Wipe down the drawer track to remove debris, and apply a very light coat of lubricant if recommended by the manufacturer. For most high-quality drawer slides, no additional lubrication is needed because the bearings are already greased from the factory.
DIY vs. Professional Installation
Although installing ball bearing drawer slides on your own is cost-effective, hiring a professional carpenter is sometimes beneficial, especially when dealing with a large number of drawers or custom furniture. Moreover, professionals have the experience to install drawer channel systems quickly with precise symmetry.
Nevertheless, going the DIY route can be satisfying and budget-friendly if you have the patience. Additionally, understanding how drawer slides work can help you maintain and troubleshoot them in the future.
Common Mistakes to Avoid
To help you perfect the process, here are some mistakes that should be avoided:
-
Ignoring measurements
-
Tightening screws before checking alignment
-
Mixing up the cabinet and drawer members
-
Using mismatched slide lengths
-
Skipping the pilot hole steps
By staying mindful of these pitfalls, installation becomes smoother and more successful.
Pro Tips to Ensure the Long Life of Drawer Slides
-
Keep ball bearing drawer slides clean and dry.
-
Avoid overloading drawers beyond their rated capacity.
-
Install handles or knobs to reduce stress while pulling.
-
Inspect drawer channel screws annually.
-
Do not slam drawers, even if using soft-close drawer slides.
Maintenance Tips for Long-Term Efficiency
After installation, maintaining your ball bearing drawer slides is simple yet effective. Therefore, every six months:
-
Clear dust and debris from the drawer channel
-
Test for any wobble
-
Tighten loose screws
-
Inspect slide movement
So, with consistent maintenance, you’ll continue enjoying effortless function from your drawer slides.
Conclusion
Installing ball-bearing drawer slides may seem complex, yet with the right tools, patience, and accurate measurements, anyone can achieve professional-grade results. Since high-quality drawer channel systems enhance durability and performance, investing time in proper installation pays off in both convenience and style.
For DIY enthusiasts and professional carpenters alike, mastering the process of fitting drawer slides ensures your cabinets and drawers remain smooth, sturdy, and reliable for years ahead.
At IPSA India, we believe that premium hardware transforms everyday functionality into luxurious convenience. Therefore, whether you are upgrading your home or designing new cabinetry, we offer a wide range of stylish and durable ball-bearing drawer slides for seamless performance. Visit our website to explore world-class solutions, contact us today, and let us elevate your spaces with intelligent design.
